Getting Started with Adamite
Installing Adamite
Currently, Adamite is in a limited, beta release - you may sign up for our field study and use Adamite by filling out this form.
Setting Up Adamite
With Adamite installed, you can set some preferences for how it operates.
When you are logged into your Adamite account, you can click "Options" in the sandwich menu in the top right corner of the sidebar to go to the "Options" page.
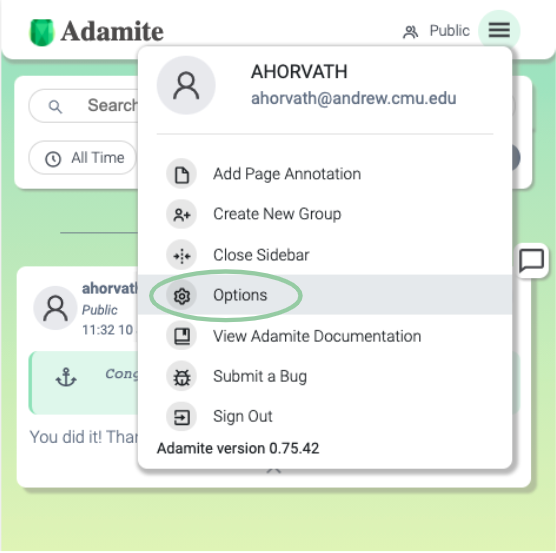
You can choose whether you want the sidebar to appear on the right or left side of your screen (default choice is right) and whether you want the content of the webpage that Adamite is on to shrink given the width of the sidebar (default choice is yes). Otherwise, Adamite overlays part of the webpage.
Using Adamite for the First Time
To begin using Adamite, navigate to a webpage you would like to annotate - for example, this documentation page!
The Adamite sidebar should open automatically.
- If Adamite does not open, try clicking on the Adamite badge.
- If that still doesn’t work, then try refreshing the page (sometimes Adamite doesn’t know to open on pages that were loaded before Adamite was installed).
If you ever want to open or close the sidebar, you can click the Adamite badge at the right side of the Chrome URL navigation bar. When you are signed into Adamite, you can also close the sidebar by selecting the "Close Sidebar" option from the sandwich menu.
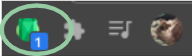
Adamite is the circled green gemstone badge in the figure shown above.
Adamite will remember whether you had it open or closed such that, when you refresh your tab, it will either open automatically if you previously had it open or will remain closed if you previously had it closed.
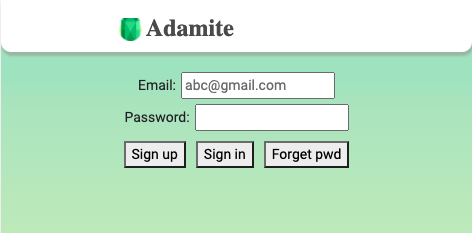
When the Adamite sidebar opens, you can create a new account. You must have an account to use Adamite. Use a valid email address and make up your own password. You may also sign in with your Google account using Google's authentication.
Once your account is created, you can begin annotating with Adamite!
Making your First Annotation
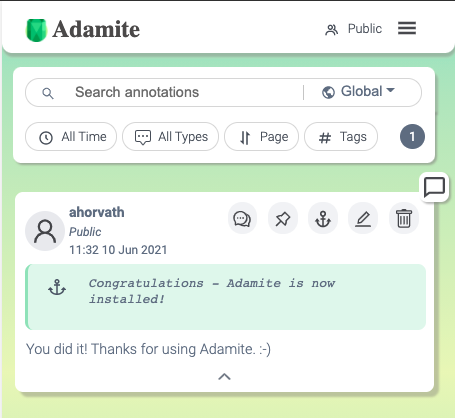
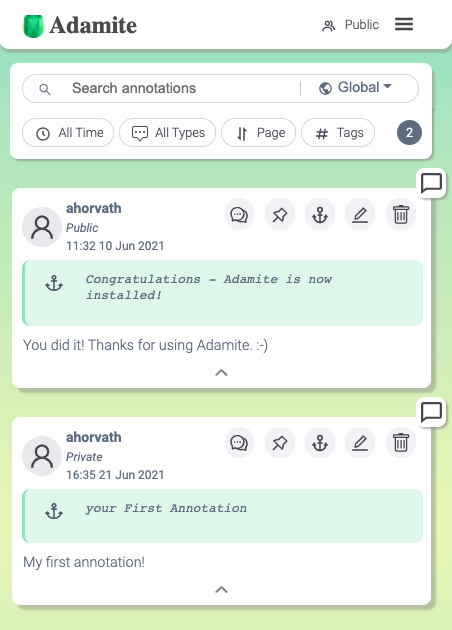
Now that you are logged in, Adamite should look like this on this documentation page, which has an annotation on it:
We will soon go over all of Adamite’s sidebar’s features, but let’s begin by creating an annotation.
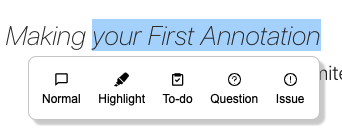
- On your webpage of choice, highlight some text with your mouse.
- Upon highlighting the text, a menu should appear just below the selection containing 5 buttons, each with an icon and text label.
- Each button represents an annotation type - a way of structuring your annotation dependent upon what the goal of your annotation is.
- Select which annotation type you want to create.
- For now, you can select “normal”.
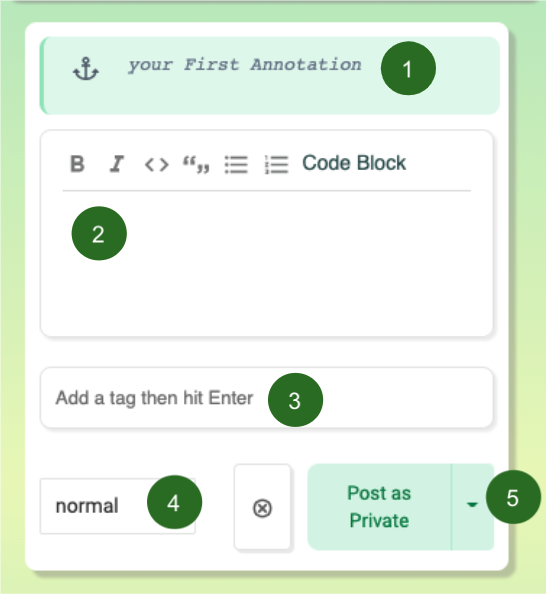
- The sidebar will update with an annotation editing pane - add the content you would like to annotate in the text editor (marked “2” in the figure) in the sidebar.
- The content you selected (marked “1” in the figure) is shown above the editing pane.
- You can add tags (“3” in the figure) to help with searching for and categorizing your annotations and also change the type of the annotation with the dropdown menu (marked “4” in the figure). You can also choose whether to publish the annotation publicly, privately, or to a group using the posting dropdown menu (marked "5" in the figure).
- Click the “Post as Private” or “Post as Public” button.
- Congratulations, you created your first annotation!
- Your annotation will appear in the sidebar and the text that you annotated will now stay highlighted on the webpage.
- The Adamite extension badge in the Chrome navigation bar will also update to show how many annotations are on the current page - it should now say “2” if you annotated this page! If you happen to visit a page that has some annotations on it, the Adamite badge will update - make sure you check out what other users have annotated!
Since we now know how to create annotations, let's learn how to share them with our collaborators.
Groups
Creating a Group
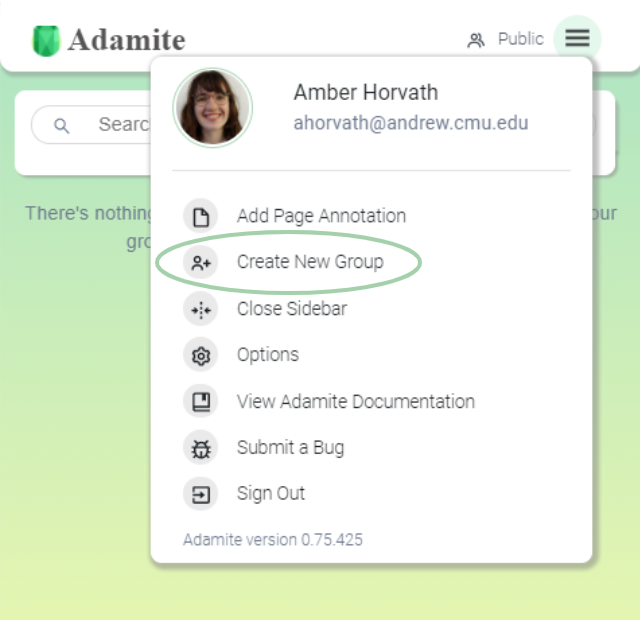
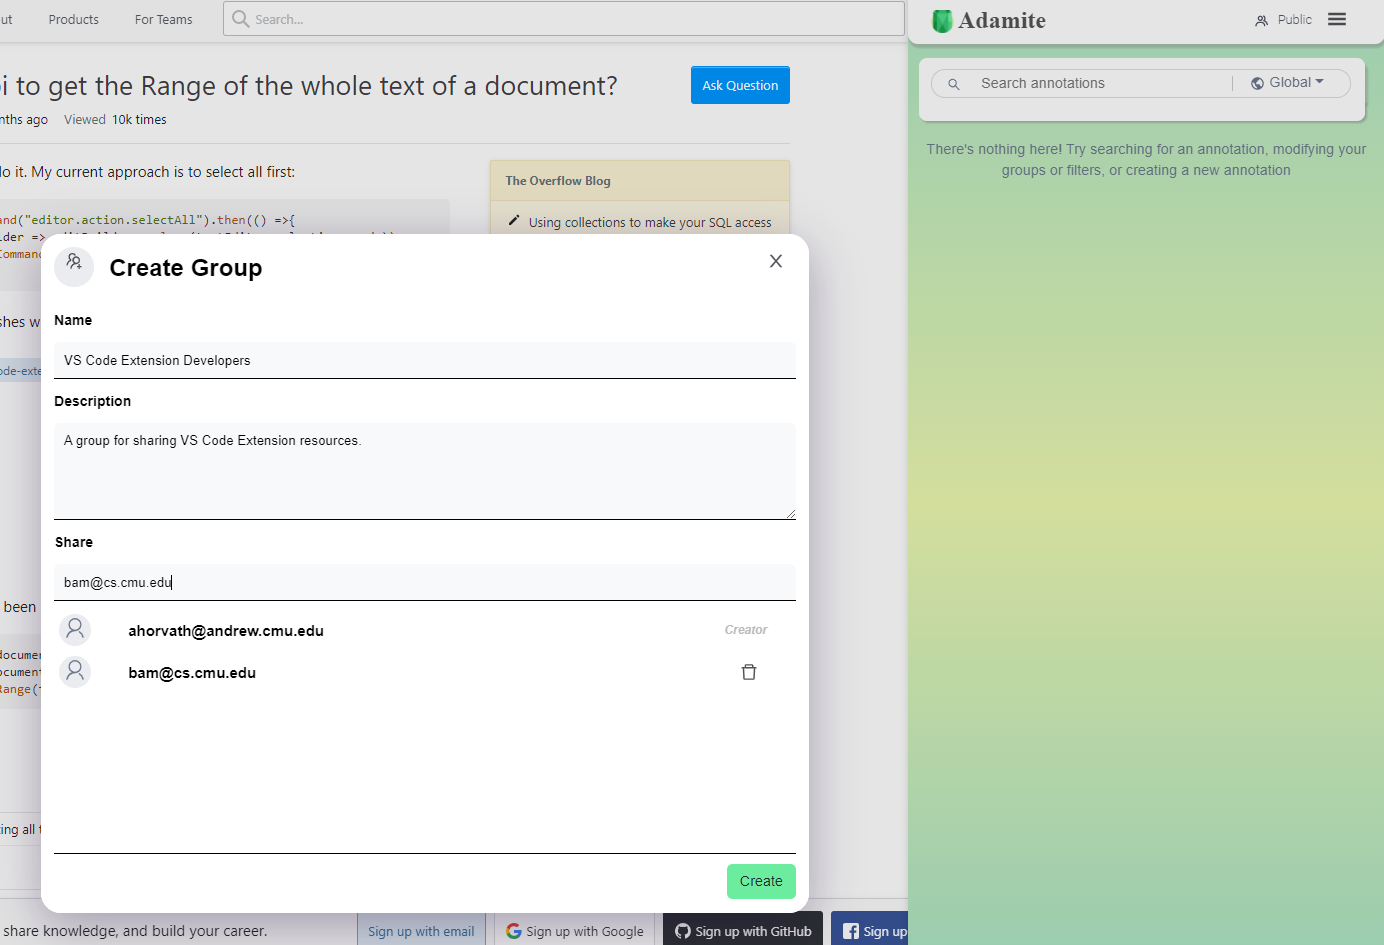
One feature of Adamite is sharing annotations with groups of developers. By default, Adamite supports public annotations and private annotations, where public annotations are viewable by anyone and private annotations are only viewable by you, the author. You can create your own group of users to share annotations with. To create a group, select "Create New Group" from the sandwich menu.
When you select "Create New Group", a modal will pop up which allows you to choose a name for your group, set a description, and add users to the group. Note that the email MUST be the email your collaborator is using with Adamite. In this example, I am creating a group for Visual Studio Code Developers and, aside from myself, have invited "bam@cs.cmu.edu" as a member. Once you have filled in all of the information, click "Create".
Group Annotations
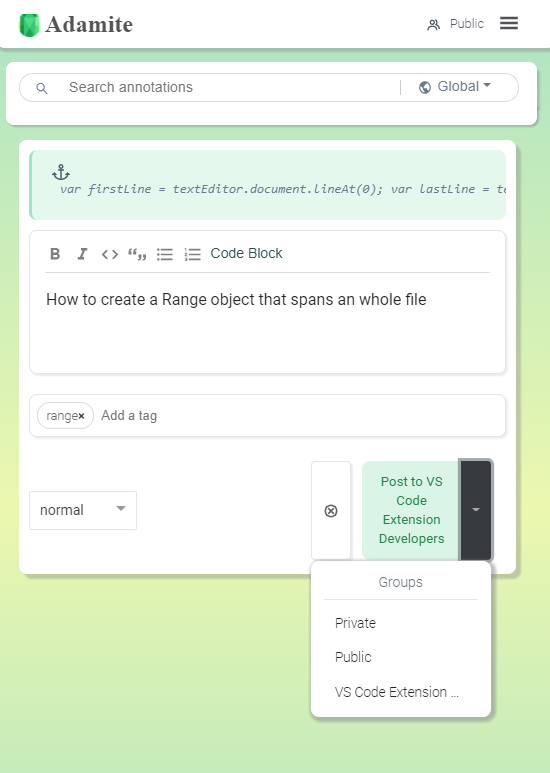
Upon creating your group, you can create annotations that are shared with that group. To share an annotation, select the group name from the "Post to" dropdown.
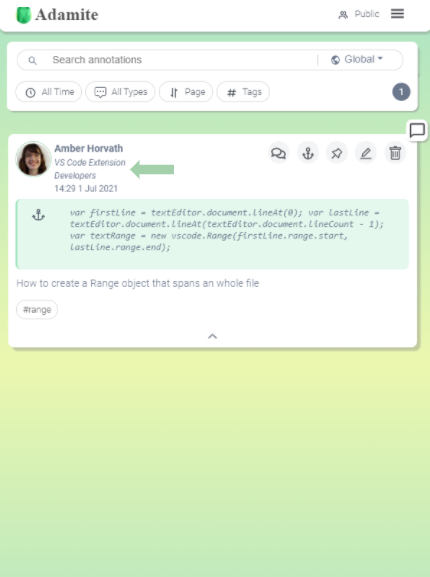
When you've created your group annotation, you will see the group name by the author name and creation date.
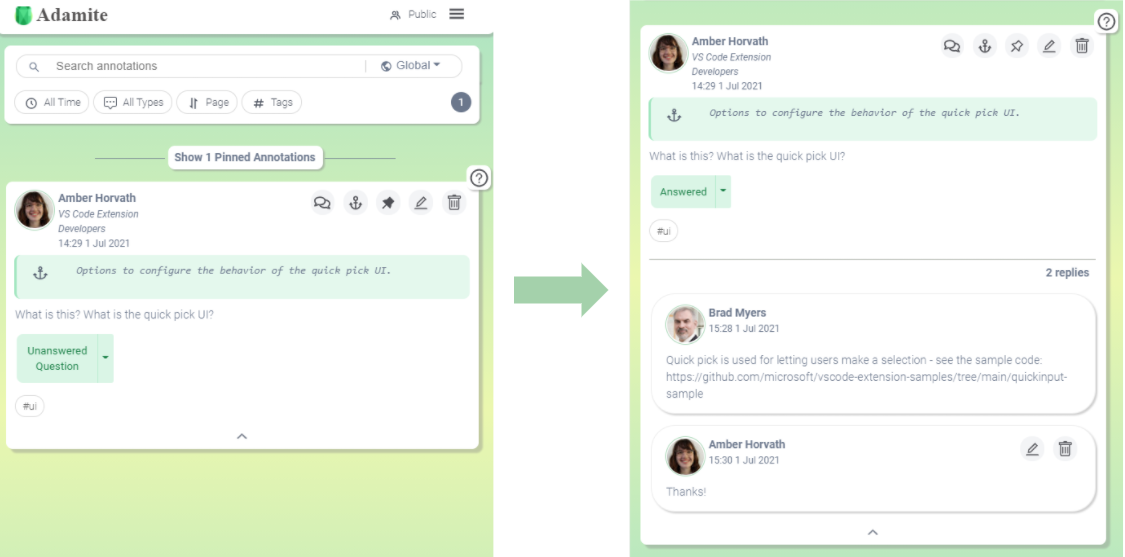
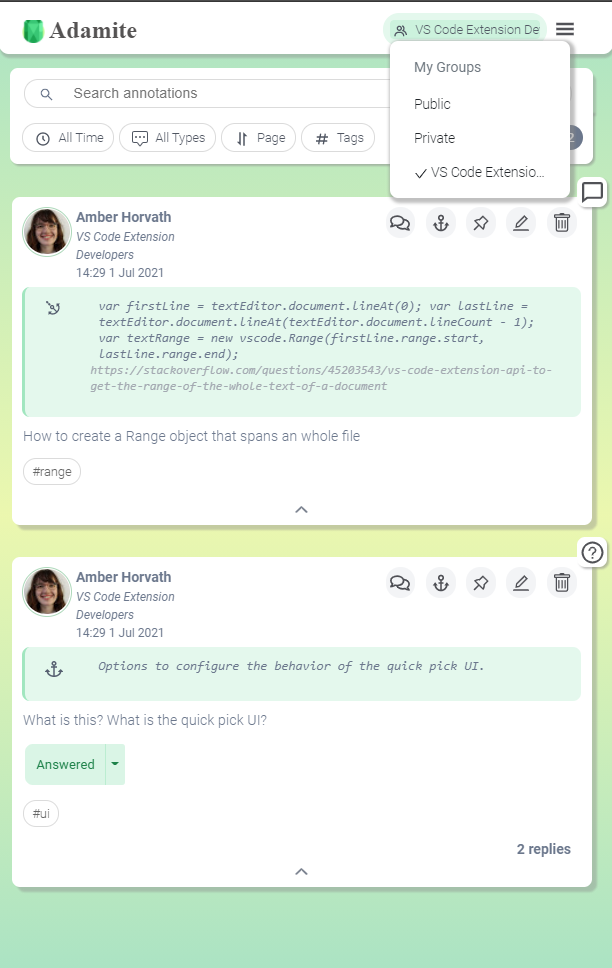
Other users in your group can see your annotations and interact with them, such as in this example where Brad Myers answers my question about a Visual Studio Code extension feature. Likewise, you can see your teammates' annotations.
You can view all annotations that are in a group by selecting that group name from the groups dropdown at the top of the sidebar. In this case, I've chosen the "VS Code Extension Developers" group.
Sidebar
What is the sidebar in Adamite?
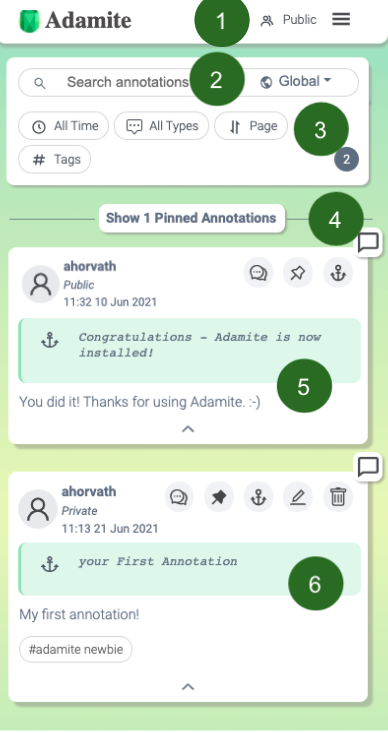
- Name of the currently-selected group ("Public" in this case) - "Public" is a default group that shows all of the annotations that are on this page and public, your private annotations, and annotations that are shared with you through a group. You can select a different group by clicking on the text that says "Public". The sandwich menu to the right of the group dropdown allows you to see your username and email, add a page-level annotation, create a new group, close the sidebar, view the options menu, view the documentation, submit a bug, and sign out (see the picture under "Setting Up Adamite").
- The search bar can be used to search for annotations - annotations can be searched globally, on the website, or on the page. Searched for annotations will match on anchor content, annotation content, and tags.
- Filters that will change the set of currently-viewable annotations in the sidebar. The time filter can be used to filter out older annotations, with the default state set to show annotations that were created at any time. The annotation type filter sets which annotation type is currently viewable in the sidebar. You can also sort the annotation list by where the annotation is located on the page, or by when the annotation was created. You can also filter by tag by clicking on the "Tags" filter. The number in the bottom right corner shows how many annotations are viewable in the sidebar.
- The button to show the user's list of pinned annotations. If a user has no pinned annotatinos, this button will not appear.
- The first annotation in the list of currently-viewable annotations. By default, Adamite will show all annotations authored on that page that are public, in a group the user is in, or are private and were authored by the logged-in user. This is a public annotation, shown by the text that says "Public" under the username "ahorvath".
- A private annotation that is pinned and has a tag.
Since we now know how to create annotations, let's learn how to share them with our collaborators.
What is an annotation in Adamite?
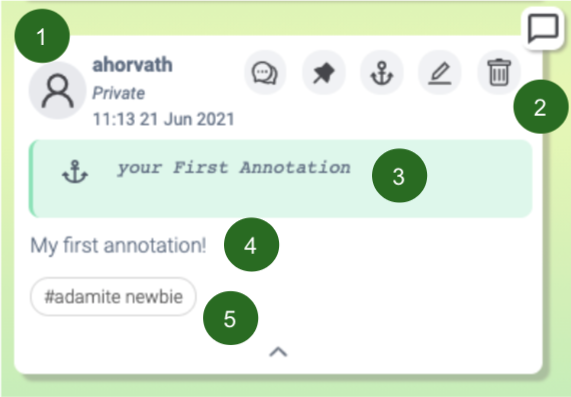
- Name of the annotation author ("ahorvath" in this case), the group name that the annotation has been published to (with "Private" being a default group that is just yourself), and the date and time the annotation was published at.
- All of the operations you can perform on an annotation - the speech bubbles are the "reply" button which allows you to reply to an annotation, the "pin" allows you to pin an annotation so that it's always available in a pinned annotation list (this annotation is pinned as shown by the filled-in pin icon), the anchor button allows you to add another anchor to an annotation, the pencil icon allows you to edit an annotation (only available to the original author of an annotation), and the trash can icon is used to delete an annotation (only available to the original author of an annotation). The icon in the top right corner shows the type of annotation with this annotation being a "normal" type.
- The original text, referred to as an "anchor", on the webpage that has been annotated - clicking the anchor button will scroll to where that text is on the page.
- The user-generated annotation content that is tied to that anchor point.
- The tag for this annotation - you can filter the annotation list by clicking on the tag name.